Friday, 23 September 2016

Autumnal thank you


I love my dies and am learning all the time there are just so many possibilities.

I decided to use them to make a thank you card for my son before he asks for one last minute as he will want one for hospital staff when he has day surgery next week.

I decided to have a play with spritz inks and waterspritz too. I used them with the negative from the leaves die cut ,my makeshift stencil. You can just make out the shape beneath my die cut leaves.

I used the leaves from leaf collage ,they are such fun as with their stitching which I cut from white and kraft card, The white I used distress inks to colour the kraft I left naked. I randomly placed them on my spritzed layer from which I had cut a majestic maple leaf from. All dies are memory box or poppystamps as these make up the majority of my collection so far  and they are just fab.

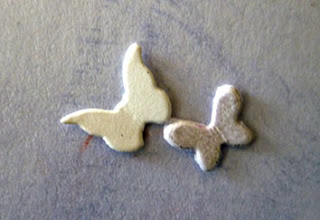
I coloured a scrap of card with bright blue as I love the bright clear skies that alternate with the dull cloudy ones of autumn. I decided to make a shaker card so used some of the smaller die cut leaves from the collage die but this time cut in metallic card as when the sun shines they seem to shine.

I added a small 'thank you' peel-off sticker to the front of the acetate .

I finished the card by adding a gold mirri matt to link to the mirri leaves in the shaker.


I would like to enter this card into the following challenges;-

Auds sentiments -fall colours

MFP -stencils and sprays

Cards in envy - hello fall

Stampavie and more - autumn colours

CRAFT - autumn/halloween/thanks giving

4 crafty chicks - colours of fall

Art impressions - cards to die for

Tuesday, 20 September 2016

Poppy stamps park

I saw a card made by Olga (told you she makes beautiful and inspiring cards) here and I decided to treat myself to some of the dies she used. Only some as all the retailers I use who have reasonable prices were out of stock for many of them. I know my card is nothing like Olga's beautiful card and in no way as beautiful but thought it would make a fun card for my brother's up coming birthday.

He is and has always been cycling mad, could ride a bike before he could walk and even went out cycling on Christmas day every year when I was still at home not sure what he does now he's married but I suspect he still does. 

I decided to make my poppy stamps cottage fence card into a park and used these memory box Alessandria die cut trees.  I should say I embossed the floor of the card using a sizzix wall embossing folder before sticking the side panels to the main body. The trees I stuck them to card after die cutting, to strengthen them I added more card and cut around them . I hind sight I think I would have been better off separating all the pieces and colouring them first as this wasn't easy once they were all stuck together so please don't look too closely as I made a mess in a couple of places. I used my favourite colouring medium promarkers to add the colour.


I added some die cut birds again from poppystamps and again coloured with promarkers.


I used a mix of punches and foliage dies to cut my hedge and added some flowers again from a punch and stuck them to the fence panels.

The cycle is from Memory box and is actually a girly cycle. I experimented and cut one of the two bars and found I could lift it and make a boys cycle,not exactly a racer but you can't have everything.

I coloured the cycle again with promarkers including some metallic ones it really has a lovely shine but my photos unfortunately don't show this. I stuck to the fence overhanging the centre to draw the eye to the centre but also to give the idea of it being rested against the fence.


I finished the card by rubbing cocoa memento ink along the stones and added a die cut sentiment from Britannia dies in dark green.


Overall I love how this card stands and its just a little different. You may ask why a park setting, thought it might wind my baby brother up a little if it jogs his memory, as he took one of his girlfriends cycling to the park and he needed the toilet. His girlfriend said she didn't need to go so he left her outside with the cycles. His girlfriend changed her mind and instead of waiting till he came out went in at the same time leaving the cycles (both my brothers and mine that he had borrowed for her )and guess what mine was stolen. The relationship didn't last long as she really felt it wasn't her fault ,didn't offer to replace the cycle and complained that she had to walk home as he wouldn't call and pay for a taxi as the park wasn't on a bus route.

Not that I hold any grudges but well he is my brother and I don't get to torment as much now he is in another part of the country, and if it doesn't jog his memory well its a nice setting for a cycle ride.

Best thing about this card it fits flat in an ordinary envelope.


I would like to enter this card into the following challenges:-


Little red wagon - be a good sport

crafting when we can - use favourite colouring medium

get creative - use embossing

craft your passionn - anything goes

crafting from the heart - anything goes

OSAAT - special day

Monday, 19 September 2016

Early autumn rain


One of the few things I like about autumn is the changing colours of the leaves and much as I really am a bit of an arachnophobic  I love the magical look of spiders webs after the heavy dew or rain that only really happens in autumn.
I used these lovely leaves from poppy stamps leaf collage, I love the stitching detail on them and coloured them with a mix of autumnal colours and green to simulate the early autumn changes. I used clear drops to simulate water drops from dew or rain.

I used this card by Olga from building your world as my inspiration she makes some of the most beautiful cards and when I grow up I want to make cards just like her.

I used poppystamps fine spiders webs cut in vellum and more clear drops added . I used the die cut negative from the leaf collage as a stencil and used the same distress inks to stencil leaves to the base card front.
I cut 2 frames slightly smaller than the card and attached the webs randomly to the front of the card. I added the frames and then randomly placed the leaves overlapping the webs so it looked as if they were suspended from the leaves and filled the frame space. I trimmed any bits of leaves that poked out under the frame edge. I finished my card by adding a poppy stamps spider coloured in black promarker and used a black pearl for its body.

I haven't yet decided which orientation to use the card on ,I think it looks just as good  portrait or landscape and haven't added a sentiment as yet either, think it would make a nice male birthday card or retirement card or just a hello or thank you.


I would like to enter this card into the following challenges:-

My time to craft - stitching real or faux

Fab and funky - go outside

Fairytale challenge - falling leaves

city crafter - turning a new leaf

Make my monday - autumn colours

come and get it - lots of layers

IDIC - anything for fall

the paper girls - nature

left of centre -4 legged creature
(hope 8 legs will do)

Sunday, 18 September 2016

Christmas Bauble improvisation

Two Christmas cards this time using a mix of dies and stencils from spellbinders, Britannia and memory box .

I used this card by Pam for inspiration and although I didn't have the exact dies I tried to improvise.

For my first card I used a memory box stencil as a base layer for my card on top of a white base card. I haven't yet used my stencils in any conventional way by colouring through them but am loving using them for embossing.


I used fancy music border cut in glossy black card to create my musical backdrop.


I used Eliana bauble again from memory box,cut it twice and inlaid one with the other.

I used spellbinders poinsettia and used 3 yellow pearls for the centre.
No sentiment on this card as the stencilled background says merry Christmas though I could add a sentiment later not sure yet.

 For my second card I decided to hand draw my music score and just used the notes from fancy music border , no background this time other than the music. After looking at my photos I need to fill the gap in my treble clef.


I ued the remaining  pieces of my bauble die-cuts and pointsettia dies but this time added a Britania die cut 'seasons greetings'.


I quite like both cards but think the stencil embossed backing just adds that little bit of Christmas magic.
I would like to enter these cards into the following challenges:-

QKR - anything goes

Creative  corner - no patterned paper

Creative fingers - anything goes

Glitter n sparkle - anything goes

MFP - anything goes

TDLLC  facebook challenge - Memory box challenge
(Been crafting for as long as I can remember in one form or another but die cutting other than cutting mats for about a year and still learning)

A bit more time to craft - anything goes

CRAFT - Christmas


Saturday, 17 September 2016

Memory box meets stampedous dancing in the rain


I saw this Stampedous image on a card whist searching for memory box images for ideas and fell in love with it. There is very little colouring to do as most of the image is black so I used promarkers to give the lady a red dress and matching shoes. I them fussy cut the image out. 


The image comes with a lovely sentiment though it is rather close to the image and rather than cutting the stamp in two I managed some masking to enable me to stamp just the sentiment and fussy cut this to allow me to place elsewhere on my card.


I  used the Memory Box splashing puddles die for my backgroud, I didn't want the puddles as they are a little too large for my couple to dance through, it just made me imagine that if they tried they would be in water waist deep and it would be like some sad slap-stick comedy. instead I used a cut out die-cut as a stencil to place my raindrops as although large they didn't look too big. Initially I coloured them red but went over them in black(again promarkers) as I thought the red looked a bit too much like it was raining blood.


I added some poppy stamps candy hearts again coloured in red promarker and randomly stuck them in-between the raindrops and added one to the sentiment too.

I finished the card by adding a darkroom 'happy anniversary' again in black.

I am quite happy how my card turned out and how I used my die in a different way too as I think the raindrops look far more random than I could have achieved freehand, and will definitely be doing this again.

I would like to enter this card into the following challenges:-

Memory box  -stencil


crafty gals corner -freestyle

craft your passion -anything goes

Artistic inspiration - anything goes

crafting from the heart - anything goes

Stempelsonne - anything goes

Creatalicious - anything goes optional inspired by a song(lady in red)

Allsorts - black,white and one other colour

crafty catz -red, white and black

Thursday, 15 September 2016

monkey around ...it's your birthday

One of my nephews has a birthday coming up, I don't see him very often as they live quite away away, so don't really know him that well. I know hes not into sport and is more studious than his brother but I am sure he can be a bit of a monkey at times.


I used this fun jungle stamp from High Hopes and coloured with promarkers. I created the sky using a scrap piece of card cut into a rough cloud shape, a cotton wool ball and some chalk.


I used these cute monkey dies from poppy stamps and cut them out in white card and again coloured with promarkers before letting them swing through the jungle trees. 

I used this happy birthday die from poppystamps and cut it out in black glossy card and overlaid it onto my jungle scene. I added a couple more monkeys.


I finished the card by edging the mat with a blue promarker before laying on a white base card. 

I hope he sees it as a fun card and not too babyish , as he is at the cusp of being a teenager and its an awkward age for boys cards as they are neither child or teen.


I would like to enter this card into the following challenges:-

Stamping sensations - one for the boys

cards in envy - for the kids

Penny's - anything goes


Lemon shortbread - anything goes

Everybody art - anything goes

cards und more - no designer paper

OLLCB - anything goes

The cutie pie challenge - Happy birthday


Saturday, 10 September 2016

red white and black celebration

My hubby celebrated his birthday a few days ago and my son wanted a card for his Dad and requested one with a music theme and this is what I came up with for him.

I decided to use dies as they give a nice clean finish which seems suitable for many men , no fuss and is true for both my hubby and son and must admit I do like clean lines and am not a fussy person myself.
I love these dies by Dave from poppystamps and memory box they all just work so well together. 
I cut a circle from a white base card and filled with acetate to make the shaker card. I don't like it when all the confetti fill falls to the bottom so after placing my confetti shapes I made a close fitting acetate sandwich to keep them in place by using double sided tape to stick another piece of acetate directly to the first sheet of acetate. I used red and silver large and small balloon confetti and silver music note confetti.
I should have said before I added the acetate I cut the music flourish from the white base card overlapping the circle edges. Once the acetate was in place I inlaid the music flourish with another this time cut from black glossy card. Making the acetate larger than the circle means there is something for the inlay to stick to. 
I cut an insert fro the card cutting a circle from it so as not to obscure the window.


The front of the card was completed by attaching the birthday sentiment in red mirricard.


I would like to enter this card into the following challenges:-


crafting when we can -Happy birthday

Unicorn crafts - happy birthday

Brown sugar -anything goes

Happy little stampers - anything with dies


Tuesday, 6 September 2016

Autumn's morning dew

I have been so inspired by the different uses of dies and although I know there are many on the market and although I haven't found them yet am sure there are many blogs that show how versatile other die brands are I found memory box and poppystamps dies and blogs and am in awe as to how their design team use dies to make some of the most gorgeous cards and projects.

I am still learning and enjoying every minute and am trying though often unsuccessfully to incorporate stamping with die cutting but this project doesn't include stamping just one of my other loves sparkling colours in the form of mica pigment inks.

I was inspired by the cards that Olga created with the spiders web die and Marybeth's  and Yoonsun's majestic maple leaf cards so when I managed to get my inky fingers on these dies I had to play and this is what I came up with.


I cut several majestic maple leaves and although maples I think they could easily pass as sycamore leaves too. I used mica pigment inks from moonglow to randomly add splodges of various reds,browns and green shades and left them to dry.

I used the spider web dies and cut out in white vellum and used some clear dimensional glue to add water droplets as though morning dew to the joints of the web and again left to dry.


I gently curled the leaves once dry to simulate dry crunchy leaves found fallen from trees in autumn and then added more of the 'water drops' in places they may collect on the leaves. Lots of patience required as again they had to sit to one side to dry.


What would webs be without a spider so I cut one coloured in black  promarker and added a black half pearl to the body for added dimension.

The fun bit was adding all the elements to a card, I tried white as a base but that just didn't look right so I opted for black as my base card , it just adds to the drama and shows the leaves colour and webs off so well.
I gathered the leaves together and from a low height dropped to my desk to get a random grouping and then used hot glue to stick them to the card in a similar pattern keeping the dimension.
The webs I tried to make them look like they were suspended between the card edges and the leaves and then just placed the spider appropriately.

Not sure what occasion I would use this card for or where I could add a sentiment other than on the outside , maybe a retirement or gents birthday but for now I have it stood on the side in my craft room as I just like looking at it and definitely think it would be best hand delivered or posting might require lots of packaging to prevent squashing.


I would like to enter this project into the following challenges;-

Simply create too - fall colours

MAWTT - all kinds of everything
( mines early morning dew)

613 Ave create - anything goes optional twist colours of fall

Whoopsi daisy - autumnal colours

Everybody art - leaves

Crafting from the heart - anything goes

craft your passion - always anything goes

crafty card makers - layer it up

unstampabelles - changing seasons  twist of masculine


Monday, 5 September 2016

17th anniversary

There doesn't seem to be a traditional gift for a 17th anniversarry but the modern gift is furniture. 
Now much as I would like to give a gift of furniture I think it is something very personal and after 17 years of marriage not something you would expect a couple to need . 

With this in mind I decided to compromise and send some furniture  on a card at least that way it won't take up much room and when they are fed up of it, it can be recycled  or thrown away.

I used a white base card ,a black and silver matt and a darkroom 'happy anniversary' sentiment stamped in black ink. I drew a rough design of a chair in pencil which I erased when the ink was dry. I used scraps of paper to mask areas I didn't want to stamp and think it turned out quite well, at least I don't think the couple will get another card like it, just hope they realise what it represents (maybe I should put a note inside explaining,lol).

I would like to enter this card into the following challenges:-


Creatalicious - anything goes optional anniversary


The corrosive challenge -anything goes 

Sweet stampin' - wedding /anniversary/love

Sunday, 4 September 2016

How to use it all

I love this little flower die and was inspired by this card by Sherry which you can see here from memory box .
For my first card I used some of my old ink pads that are on their last legs as the pads seem to be disintegrating or they are drying out.


I used a London fog ink for the base colour which I had to add a splash of water to to actually get colour from it. I rubbed it over a stitch edged rectangle. Instead of being grey it had a green tinge but I quite liked it.  I then used the negative from the daisy die to use as a stencil and once the base colour had dried I used the same ink to the petals through the stencil.


I then used a peony dye, and slightly offset the flower head and inked again. I then I added the daisy outline over the inked flower heads. I added some small die cut butterflies again coloured with the same inks and attached randomly along with 3 small pale pink sequins.


I finished the card by adding a ribbon and a hand tied bow to the rectangle and a tag sentiment stamped with the grey ink using a lily of the valley stamp and adding all to a white base card.


I wanted to make full use of my die so I decided to make another card using the negative bits. This time I used a pale blue with the peony pink and when the ink was dry layered the petals .I used a white sakura gel pen to outline the petals and leaves then drew stems to complete the flowers.


I added white butterflies this time but no sequins.


I finished with white ribbon and again a tag from lily of the valley stamp fussy cut.


One die,two cards ,two different looks  no waste.


I would like to enter these cards into the following challenges:-

Deep Ocean challenges - things with wings

My time to craft - something that flies

Everybody art -butterflies

MFP - CAS birthdays


Dragonfly journey - butterfly


Saturday, 3 September 2016

You're a star


It's always good to have a thank you card handy as you never know when you might need to say an extra special thank you.


I made this one using a couple of dies and a brilliance ink and it came together quite quickly. I had die cut a stitched rectangle and used the starlit die across it, and used a brilliance ink just swiped across the card to add colour. 


I attached it to one side of a white base card and die cut jumbled thank you in white card and stuck this to the other end of the card.

I would like to enter this card into the following challenges:-

Simon says wednesday -anything goes

Kraftin kimme -anything goes

Penny's -anything goes

Crafty gals corner -anything goes

Lil' red wagon -use ink for other than stamping

Tuesday throwdown - CAS

CASology - stitch

Die cuttin' Divas -anything goes

The ABC challenge - O for open